About the PZEM-004T V3.0
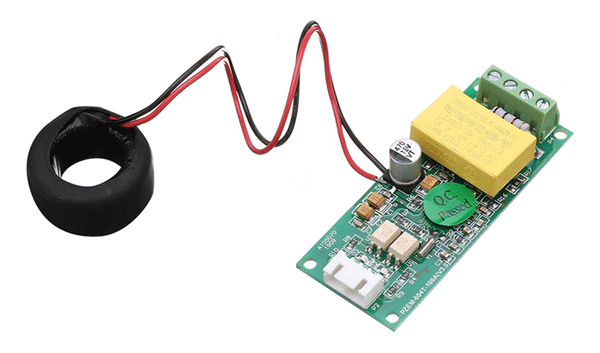
In this article, we will discuss the use or use of the PZEM-004T V3.0 module that is interfaced or programmed using Arduino UNO or Arduino Mega2560. If using the example program with Serial Hardware, Arduino Mega2560 is needed because the Arduino UNO Hardware Serial is already used for communication with Serial Monitor.
As I stated in the previous article, that the PZEM-004T V3.0 module is an upgraded version of PZEM-004T V2.0 and also the protocol for communicating the interface is different, the library program for PZEM-004T V2 cannot be used for interface with PZEM-004T V3.0.
To find out more detail and complete about the differences and advantages between the two, please open the previous article : Get to know PZEM-004T Electronic Modules for Electrical Measurement Tools
As for the sample PZEM-004T V2.0 module program, please open the article link below :
Example of the PZEM-004T V2 V2.0 Interfacing Program Using Arduino
Hardware Required
In this example PZEM-004T V3 module program, some hardware is needed, among others :
- Modul PZEM-004T V3.0
- Arduino UNO or Arduino Mega2560
- Some M-F / F-F jumper cables
- Load (can use TL Lights / Bulb / LED / Electric Drill)
- USB to Serial TTL (optional for testing functions using the PZEM-004T Master application).
Circuit / Wiring Diagram
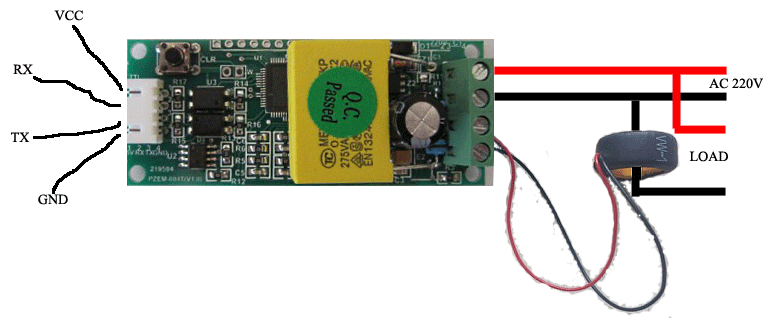
The following table shows the connection or connection between the PZEM-004T V3.0 module and Arduino
| PZEM-004T V3.0 | Arduino UNO / Mega2560 |
| VCC | +5V |
| GND | GND |
| TX | RX (Software Serial / Harware Serial) |
| RX | TX (Software Serial / Harware Serial) |
For connection or connection between PZEM-004T V3.0 with Current Transformer (CT), Load and Arduino in full can be seen in the picture below :

PZEM-004T V3.0 Module Function Testing
There are times when we make a program with Arduino and after uploading it turns out that the output is not as expected, many complain that the PZEM-004T V3.0 module is corrupt or malfunctioning.
For this reason, before interfacing the PZEM-004T V3.0 module with Arduino, we recommend that you first test the function of the PZEM-004T V3.0 module to ensure that the PZEM-004T V3.0 module is not damaged or functioning properly.
Download the application for testing the function module PZEM-004T V3.0 on the following link :
PZEM-004T software New version
Next extract / unzip the file that was downloaded earlier, then register the file: isAnalogLibrary.ocx on the Windows OS PC / Laptop system in the following way :
- Copy file isAnalogLibrary.ocx to folder : Windows/System32/
- Open command prompt or cmd.exe
- Type : Regsvr32.exe C:\Windows\System32\isAnalogLibrary.ocx
- If successful, a Registered Successfully notification will appear
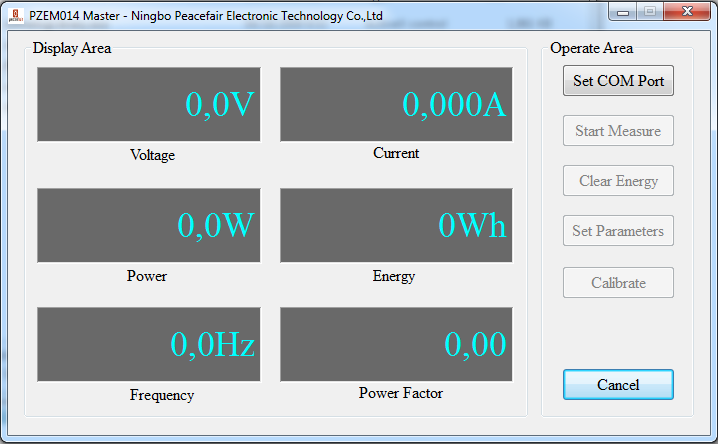
After successfully registering the file: isAnalogLibrary.ocx, then run the file: PZEM004T-Master.exe to test whether the PZEM-004T V3.0 module is functioning or not..

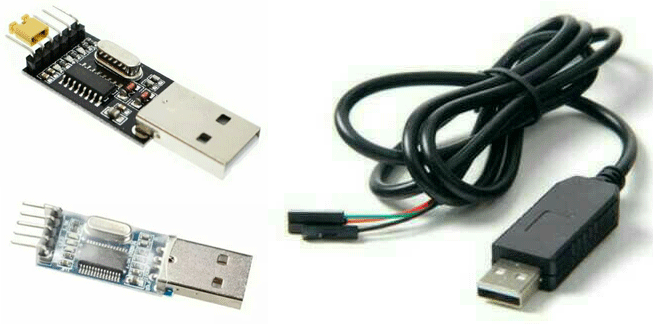
Please note, to do testing using the application, you need a USB to Serial TTL hardware which is quite widely available in the market such as: type CH340, type PL2303 etc. as shown below.

After the PZEM-004T V3.0 module has been assembled either with Load (can be an Electric Light / Drill) or with USB to Serial TTL and make sure the USB to Serial TTL has been recognized / detected by Windows OS, click Set COM Port then click Start Measure.
After testing or testing the function and confirmed that the PZEM-004T V3.0 module is functioning properly, it can be continued by making a program with Arduino or other microntroller.
Code Program
In the example program to access or interfacing the PZEM-004T V3.0 module using this Arduino, we use the following library :
PZEM-004T-v30 or PZEM-004T-v30
After the library is downloaded and installed, open the existing sample program from the default library or copy paste the following sketch :
#include <PZEM004Tv30.h>

PZEM004Tv30 pzem(11, 12); // Software Serial pin 11 (RX) & 12 (TX)

void setup() {
   Serial.begin(115200);
}

void loop() {
   float voltage = pzem.voltage();
   if(voltage != NAN){
       Serial.print("Voltage: ");
       Serial.print(voltage);
       Serial.println("V");
   } else {
       Serial.println("Error reading voltage");
   }

   float current = pzem.current();
   if(current != NAN){
       Serial.print("Current: ");
       Serial.print(current);
       Serial.println("A");
   } else {
       Serial.println("Error reading current");
   }

   float power = pzem.power();
   if(current != NAN){
       Serial.print("Power: ");
       Serial.print(power);
       Serial.println("W");
   } else {
       Serial.println("Error reading power");
   }

   float energy = pzem.energy();
   if(current != NAN){
       Serial.print("Energy: ");
       Serial.print(energy,3);
       Serial.println("kWh");
   } else {
       Serial.println("Error reading energy");
   }

   float frequency = pzem.frequency();
   if(current != NAN){
       Serial.print("Frequency: ");
       Serial.print(frequency, 1);
       Serial.println("Hz");
   } else {
       Serial.println("Error reading frequency");
   }

   float pf = pzem.pf();
   if(current != NAN){
       Serial.print("PF: ");
       Serial.println(pf);
   } else {
       Serial.println("Error reading power factor");
   }

   Serial.println();
   delay(2000);
}
Or an example using Serial Hardware as follows :
#include <PZEM004Tv30.h>

PZEM004Tv30 pzem(&Serial3);  // Menggunakan Hardware Serial 3

void setup() {
   Serial.begin(115200);
}

void loop() {
     float voltage = pzem.voltage();
     if(voltage != NAN){
         Serial.print("Voltage: ");
         Serial.print(voltage);
         Serial.println("V");
     } else {
         Serial.println("Error reading voltage");
     }

     float current = pzem.current();
     if(current != NAN){
         Serial.print("Current: ");
         Serial.print(current);
         Serial.println("A");
     } else {
         Serial.println("Error reading current");
     }

     float power = pzem.power();
     if(current != NAN){
         Serial.print("Power: ");
         Serial.print(power);
         Serial.println("W");
     } else {
         Serial.println("Error reading power");
     }

     float energy = pzem.energy();
     if(current != NAN){
         Serial.print("Energy: ");
         Serial.print(energy,3);
         Serial.println("kWh");
     } else {
         Serial.println("Error reading energy");
     }

     float frequency = pzem.frequency();
     if(current != NAN){
         Serial.print("Frequency: ");
         Serial.print(frequency, 1);
         Serial.println("Hz");
     } else {
         Serial.println("Error reading frequency");
     }

     float pf = pzem.pf();
     if(current != NAN){
         Serial.print("PF: ");
         Serial.println(pf);
     } else {
         Serial.println("Error reading power factor");
     }

     Serial.println();
     delay(2000);
 }
After the above sketch program is uploaded to the Arduino board, open the Serial Monitor at Baudrate: 115200. If all functions well, the reading data by the PZEM-004T V3.0 module will be displayed in the Serial Monitor window.
++++++++ May be Useful ++++++++
Like!! Thank you for publishing this awesome article.
Hello, it works great. thanks for the hard work. greetings Ronald
Cannot running on Windows 10 64bit. Even when i set its compatibility with any Windows options. Also even when i run it as administrator.